Showing posts with label Android. Show all posts

Mar 1, 2017

Getting Started in Android Development: Part 3: Reducing Bloat

So far we have seen Part 1: Building the First App, and Part 2: Publishing the first App.

That Feeling When you build a brilliant piece of software and the users are ripping it from your fingers to the sound of raving reviews:

  • dad: I'm home! Have you seen my first app I've e-mailed you about?
  • kid: Hi. Yup.
  • dad: So?? Do you like it? Have you given it any stars?
  • kid: Just one. It can do almost nothing and it takes up too much space.

And the kid is right. App description: Press a button and get a random number between 1 and 6. App size: 6MB. Six. Megabytes.

In this post we will reduce that over a hundred times to 44KB.

Thanks to SUSE, my employer, for sponsoring a company-wide Hack Week which this project was a part of!

Debug or Release Build?

I did not manage to make a release build in the Android Studio IDE. So I tried from the command line. (J. Reidinger has pointed out that I should read Configure Build Variants.)

$ sudo zypper install java-1_8_0-openjdk-devel       # to provide javac
$ ./gradlew assemble
[downloads some deps at first... 280MB]
[lots of output for normal build too]
$ (cd app/build/outputs/apk; stat -c "%'9s %n" *.apk)
1,443,734 app-debug.apk
1,337,890 app-release-unsigned.apk

Apparently my hopes that a release build would be significantly smaller were unfounded. The APK has 1.5MB and takes up 6MB when installed.

Shrink Your Code and Resources

First I searched the web for "minify android app" and eventually arrived at Shrink Your Code and Resources in the IDE manual.

Using minifyEnabled true in build.gradle shrunk the signed release build from 1,347,038 bytes to 786,674, which results in 2.39MB installed size. (Did not find a way to install this build from the IDE, used adb install -r ./app/app-release.apk.)

Changing proguardFiles from proguard-android.txt to proguard-android-optimize.txt slightly shrinks the APK to 771,406 bytes.

Adding shrinkResources true: 745,490 bytes, 2.21MB installed.

Code Bloat: Activity Base Class

It seems that now the main reason for bloat is the sheer amount of included code: 5 methods of mine vs 4823(!) methods from the android.* classes.

Changed the base class of the main activity from android.support.v7.app.AppCompatActivity to android.app.Activity but then adb install says "Failure [INSTALL_FAILED_UPDATE_INCOMPATIBLE]". adb uninstall net.vidner.justrollonedie solved it. But I wonder what would happen if my users on the app store wanted to update. Fortunately I have none :D

The base class change improved the sizes to 661,870 APK, 1.62MB installed.

Code Bloat: API Version

I thought a 4x reduction in installed size was good enough, even if still bloated. I decided to fix one more thing before pushing an update to the store: the minimal required Android platform. (In the process of tinkering with a demo OpenGL app I discovered that android-8, supporting my old 2.2 Froyo phone, gets automatically downloaded if I declare it in the app manifest.)

So I did, and the side effect was perfect: all boilerplate code was gone and I ended up with a 17,282 byte APK, 44KB (kilobytes!) installed. Still too much for a microcontroller ;-) but good enough for Android.

Figuring out how to downgrade my code and layout and styles to still run on the older API seemed tricky at first, but then I simply generated a scratch project for android-9 and copied the differences. Then I changed one style name with the help of the API version filter (see screenshot).

Get the App, Get the Source

The source code for Just Roll One Die is on GitHub under a MIT license. You can try out Just Roll One Die on Google Play.

Feb 28, 2017

Getting Started in Android Development: Part 2: Publishing the First App

Here I simply describe what it takes to publish an Android application that I described in the previous part, Building the First App.

Thanks to SUSE, my employer, for sponsoring a company-wide Hack Week which this project was a part of!

I will only deal with free apps: no cost for the user and no advertisements. I guess it would be easy to slap an advertisement module on it or put a minimal price tag on the app. But then it would be morally wrong for me to keep the profits without giving SUSE a cut, and the organizational and accounting process would quickly turn this into a lawyer's Hack Week. Scratch that.

Registering a Publisher Account: $25

I started with the instructions at Get Started with Publishing.

I could have reused my existing Google account but decided to create a new one. The next step may put you off: a 25 USD registration fee is needed.

Then a fair amount of legalese, which I did skim through, and I was rewarded by the knowledge that Google apparently does not like developers to publish web browsers or search engines.

Publishing the App

When I thought my application was good enough to be published I went to the Developer Console to make a Store Listing.

Entered the app name, summary, long description; no surprise there, I had expected that from openSUSE RPM packaging. Then came the innovation: screenshots are required! In fact,

  • Two screenshots
  • a high-resolution icon (512x512 pixels)
  • a feature graphic (1024x500 px) which appears as the heading of the app listing page

Reportedly the new standard way to take a screenshot is Power + Volume Down. But that did not work for my Xperia phone. I had to enable the following setting, after which a Screenshot option appeared in the menu that appears after holding Power.

  • Settings, then
  • Device / Buttons, then
  • Power button / Power menu, there
  • enable Screenshot ☑.

For a moment I feared I would need to hire a designer for the icon, but then I told LibreOffice to write a 6 in a 360pt big font and used that. whew!

More form items to fill: App type: Applications (not Games); Category: Entertainment (I guess); Pricing and distribution: Free, All countries, No ads.

We do not process any user data so we check a box that we're Not submitting a privacy policy.

Now we are at a point in the form where it says that we need to submit a content rating, but it won't let us do it. I think it only allows to rate after the app has been uploaded.

Are we ready to upload the app code? Upload APK... bzzzt, wrong! must not upload a debug build. Did not find a way to make a production build in the GUI so used the CLI for a change: ./gradlew assemble... bzzzt, wrong! must not upload an unsigned build.

Signing software makes sense. Except the signing mechanism is unfamiliar to me, something involving a Java KeyStore. So I followed the manual: Sign Your App. Ended up with a file in my home directory and needing to enter two passwords each time I build a signed APK. At least no certification authority needed to be involved.

Content Rating: Category: Utility, No violence, No sexuality, No offensive language, No controlled substances (illegal drugs), No communication with other users, No sharing of personal information, No sharing of location, No digital goods purchasing, No Nazi symbolism, Not a browser or search engine.

Finally all information was there, I hit Publish, and I wondered how long the review process would take. It took about 3 hours on a European Tuesday noon.

You can try out Just Roll One Die on Google Play. The source code for Just Roll One Die is on GitHub under a MIT license.

Next

In the next part we will deal with software bloat. Because an app that can roll a 6 is justified in taking up 6MB on your kid's tablet, right? Right??

Feb 27, 2017

Getting Started in Android Development: Part 1: Building the First App

Getting Started in Android Development: Part 1: Building the First App

Do you know programming and want to start with the Android platform? Just like me! Read on.

Thanks to SUSE, my employer, for sponsoring a company-wide Hack Week which this project was a part of!

In case you wonder why Android: it is a good balance of work and play. Android is not the coolest toy to play with at the moment, but it is the most versatile device that people are likely to have at hand, especially when traveling. And Android already outnumbers openSUSE and all other OSs in my household.

This is a three part series: 1) building an app, 2) publishing it on Google Play, 3) trimming it down. In this part, we'll set up the development environment, follow the official tutorial to build a trivial app, then build a trivial yet useful app of our own.

a screenshot of my first app

a screenshot of my first app

Installing the SDK

I am using openSUSE Leap 42.1 (x86_64). You will notice that I keep tallying the disk space taken. This is because I am a bit short of space on one of my machines, and need to have an idea how much cleanup is needed.

Went to https://developer.android.com/.

Downloaded Android Studio (2.2.3 for Linux, 438 MiB, unpacks to 785 MiB), followed the instructions, unpacking to /opt (getting /opt/android-studio).

Ran /opt/android-studio/bin/studio.sh. Was greeted by an "Android Studio Setup Wizard": chose a Standard setup. Additional download of 890MB (1412MB unpacked) to ~/Android/Sdk.

Got a slightly confusing notice about KVM emulator acceleration. It seems that if you have used KVM before on your machine, the SDK will use it out of the box. But even with acceleration, don't expect the emulator to be fast. If you have a real device, use that.

"Building Your First App"

For the most part I simply followed the tutorial for building, installing, and running a trivial app that asks for a message and then displays it. The documentation feels excellent!

The one non-obvious part was choosing which Android version, in other words, which API level, to target. in the Target Android Devices dialog, the preselected option is API 15: Android 4.0.3 (IceCreamSandwich). That is presumably based on the current active device statistics which result in the app being compatible with 97% of devices. The oldest one is API 9: Android 2.3 (Gingerbread), which was a bit disappointing since my older phone from 2010 runs API 8, 2.2 (Froyo). (Don't worry, I eventually solved that in part 3.) Fortunately my newer phone has API 22: Android 5.1.1. Installed the API 22 platform too, to match the phone, about 100MB.

Connected my phone with a USB cable, pressed Run, and there it was! Don't worry, a buggy app will just crash and not affect the rest of your phone.

Just Roll One Die

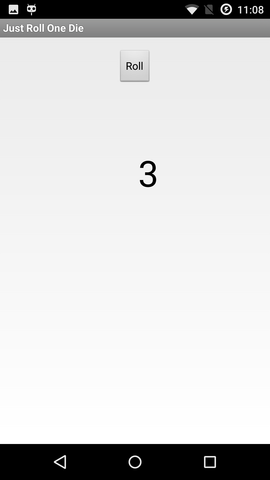
Now it looked like I knew enough to make a useful app, so I did: Once my family was on a train with a board game table but we had no dice. So my first actual app is Just Roll One Die. A totally simple application that can just roll one ordinary six-faced die. Six faces ought to be enough for anybody. No pictures, just digits.

The source code for Just Roll One Die is on GitHub under a MIT license. You can try out Just Roll One Die on Google Play. (The details of how to get an app there are described in Part 2: Publishing the First App.)

How about you?

I was amazed how easy it was and I can't believe that it took me so long to try this. Wy don't you too give it a try and let me know how you are doing.